Monday, August 4, 2014

Chicken Coop Reveal

It's pretty much finished. Oh, there are a few more things I want to do. But I'm happy now to share our chicken coop with you. The original post of the coop when we started can be found here.
 
 
I saw a similar sign on Etsy for $35. I thought it was adorable, but didn't want to fork over the cash. I had a piece of sheet metal lying around, so I made my own.

 
I added landscape timbers & rocks to cover up the hardware cloth apron. I found some metal wall art too. I'm not in love with the butterflies and will probably change them in the future...
 
 
This is really the look I'd like to achieve...but I am still looking for metal flowers & an old wagon wheel and maybe an old window.


 Here is the gravity fed watering system. The hose from the 5 gallon bucket attaches to a pvc pipe mounted inside the coop. Then there are poultry nipples screwed into the pvc pipe. We have 24 chickens and I have to fill the bucket about every third day. Here's the link that helped me build it: Bucket Waterer


Please step with me inside the home. Here we have the master bedroom. And if you're wondering where the master bathroom is, well, you're looking at that too. Chickens may produce fantastic, yummy eggs but they are horrible housekeepers.
 
 
King size chicken bed/roosting area. I had to replace my original poop hammocks, shown here. While they cleaned up well, the plastic material was not very durable. After a few months they had several holes & tears. So I've replaced them with this sturdy outdoor fabric which also has some water repellent properties. I even sprayed them with scotch guard. So far, I've only cleaned the hammocks once, but they came out great. The fabric dries very quickly too. Plus, I like this fabric pattern much better. Functional & pretty - is that too much to ask?
 
 
I just love this vintage hand-embroidered wall hanging I found for $6 at a thrift store. It has all the right colors. I am still tempted to find a place in my own home for this.  Or maybe I'll get lucky and find another one, something similar. The fun is in the hunt!

Now we move over to the nesting area. Everything pictured is from a garage sale or thrift store. It was such fun hunting for the old, pretty plates. I really wanted a small dresser to covert into a nesting area - and yesterday I found the perfect piece: FREE - on the side of the road!! My husband is wonderful - we were driving through town and I looked down a side street and yelled "Stop! Turn around!" He just smiled and helped me load it up. He either thinks I'm cute or crazy, I haven't figured out which. So pretty soon I'll have another cool piece of furniture to add to the Living Room, I mean nesting area.

Doesn't this little cabinet just scream "NESTING BOX" to you? I picked up this beauty at the thrift store for a buck. After a little sanding & altering & painting it was perfect. This piece has a funny back-story. I posted the before/after photo of it on facebook and one of my friends says, "That's my daughter's table! We put it on the side of the road!" Apparently someone else picked it up and donated it to the local charity thrift store. I love my small town!!


  The basket is screwed into the top of the cabinet so it won't tip over when the chickens perch on the edge.
 
 
The wooden eggs show the chickens where we'd like them to lay their eggs. Chickens instinctually want to add eggs to an existing nest.


 Thanks for visiting! Stop by again soon and I'll fix you an omelet.

Wednesday, June 11, 2014

Back Deck - Almost Finished

Almost finished!


We replaced the top hand rails and painted them white, along with the posts. We used a semi-transparent stain on the deck called Harbor Grey.


We still have to put up the end rail.
 
 
I still have to paint the door & shutters. Jeremy pressure washed the entire exterior of the house - that made a huge difference.
 
 
We still have to replace the skirting - can't stand the lattice! We also need to install a gutter, remove the satellite dish and other random pole and dig up some small tree stumps. But here are the before/after photos again.
 

Sunday, June 1, 2014

Next project: The back deck

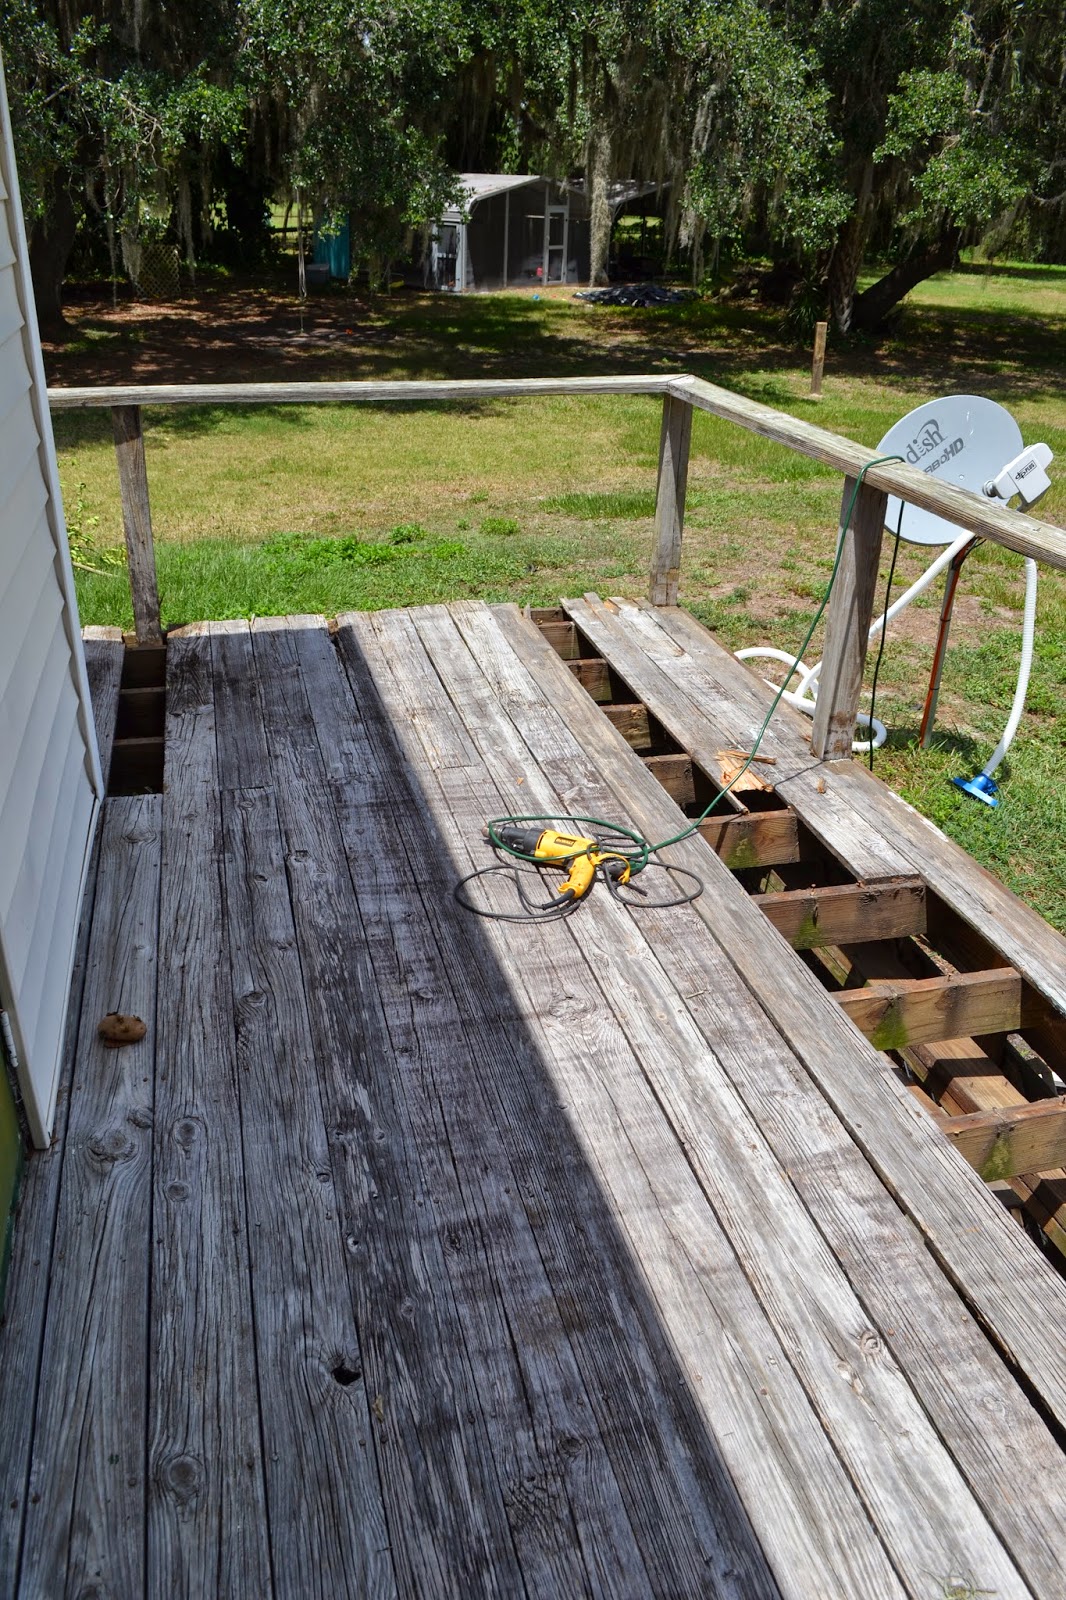
Our back deck was in desperate need of repair. Back in February, my mom stepped through a rotten board. Fortunately, she wasn't hurt. Then recently we had some friends over to enjoy our new pool.

I was nervous that their kids wouldn't watch where to step & where not to step. Yes, the deck renovation was next on the project list. Here are some before photos. The deck in question is on the left side of this picture. 


The rails/slats were falling apart so we removed them. I haven't decided if I will replace them. The deck is only a few feet high and I can see us sitting on the edge of the deck, enjoying the view of our land & kids in the pool. Of course, I'd like to get some chairs & a table for this deck down the road...


Then we removed all the old, rotten boards. And by we, I mean Jeremy. But that was only because we have only one nail puller & large hammer. I removed the rails, though!
 
And I did some laundry...love my new clothesline that Jeremy put up. I'll mainly use it for swim suits & slightly damp pool towels. But not our bath towels. I don't like crunchy bath towels. 
 
 
Then we started putting on the new boards. My job was to measure, mark & cut the boards that went around the posts. I got a new jig saw out of the deal! The one we had before was so old that when I went to the hardware store for new blades, I found they were obsolete. The solution? A new jig saw.


Stay tuned for more photos of the progress...


Poop Hammocks & Coop Cleaning

I've added poop hammocks under the roost. These collect the majority of the poop and make cleaning super easy.


Plus I added a little wall décor.

I also made them a feeder that should keep them from wasting the food. The wire on top keeps them from perching on it...i.e. pooping on it. I found the instructions on www.backyardchickens.com - love that site!
 
I read that 80% of chicken poop happens while they are on the roost. So the poop hammocks collect the majority of the poop. To clean it out, I remove the hammocks which are attached with simple hooks & eyes. I keep them folded up and then tilt them over a 5 gallon bucket. The poop falls out into the bucket. Then I bring the hammocks outside and hang them on the side of our barn & hose them off.
.

Then I hang them on the outside of the coop to dry in the sun before hanging them back under the roost. This process takes about 5-10 minutes every 2-3 days.

To clean the rest of the coop/run area, I made a sand scoop with a pitchfork, 1/8" hardware cloth & zip ties. I spend about 5 minutes a day sifting out poop from the sand. So far, everything is working as planned. These eggs better be pretty & tasty, that's all I'm gonna say.


And here's a pic of our girls...and maybe some boys...finishing our watermelon leftovers. They love it!

Our Chickens Have a New Home

We're getting closer to finishing the coop. We had 4 yards of sand delivered.


We put up siding on both sides at the back.
 
 And painted...
 
Then we put up plywood on the back wall.
 
And painted...
 
We finished framing the front & attached more hardware cloth. We have two doors because of future plans for a fence. Two doors will be more convenient down the road.

Next, I made a chicken bed - king size! My dad was in town and helped me put it up. Thanks, Dad!

So now the coop is "livable" and we moved our chickens from the brooder to the coop.


Charlie is disappointed about the "no cats allowed" policy.